
Enough said.

Welcome to the DummyStore.net blog, chronicling the adventures (and misadventures) of building professional ventriloquist dummies. It features tips, tricks and utter failures. Please feel free to submit comments, critiques and helpful suggestions.


 The verdict is still out on whether or not I like Free Form Air for certain sculpting jobs. But I really like it as a filler. It works well just after mixing the A&B compounds. (As I've mentioned before, it's a little soft and crumbly right after mixing, so it's tough to sculpt with it in that state. Mike Brose suggests waiting 30 minutes so it can dry to a more clay-like substance). But as a filler, it sands to a smoother finish than the wood fillers I've tried.


 This very blonde fellow is finally completed and ready to speed date. He looks like a kid who might be up to mischief most of the time. Or he might be the smartest kid in the class with a vocabulary like a college prosessor.
 I'm back from another road trip. This time I went to a rustic lodge near Donner Pass for the Gretsch Guitar Northern California Roundup. Had a good time meeting lots of really good guitar players. Highlight of the trip was meeting Peter Asher, known as half of the British Invasion duo Peter & Gordon. Later he discovered James Taylor, became his manager, and went on to be the architect of the so-called "California Sound". He produced most of the albums by James Taylor, Carole King, and Linda Ronstadt just to name a few. He also was the first person to hear Paul McCartney and John Lennon play their tune "I Wanna Hold Your Hand" moments after they composed it. Pretty cool.
 Braylu Creations now offers 2T and 3T legs with the lower legs and feet in black. Because they do custom work, you might be able to get any color for a little extra. The two-tone legs are handy because you won't have to buy socks if your figure is going to wear black, gray or navy clothes. It's not that 2T and 3T socks are so expensive.
  A friend has asked me to complete a conversion figure he started. It's a Bozo the Clown doll. After staring at the fellow for a few days, I've made a few initial decisions.
  I have an assignment to build a "Dead Silence" dummy. I'm using a Braylu Standard head for the project. The Standard head, however, does not have detailed ears. Just earshaped-bumps. So I bought some molded ears for the little fellow. I had to cut off the ear bumps so I can attach the new ears. I may attach some ear-shaped styrene plates inside the head so the ears have more surface to cling to.


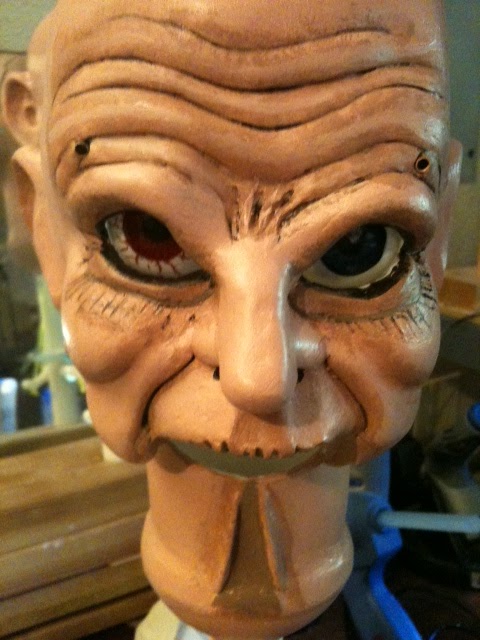 I enjoyed doing the detailed face painting today on my evil Mr. Winkle. The stipple technique is fun and effective. After I install the eyebrows, I'll add the two gross scars I have in mind for the old spook. It's important to do the eyebrow animation first so the scars don't get in the way of their movement.
 Walkin' the high wire again with this soft blinkers project. Got a great tip from a reader. I bought some Tacky glue to attach the chamois to the brass frames. I used masking tape to temporarily attach the chamois to the inside of the head. After the chamois is successfully glued to the blinker frames, I'll permanently attach the chamois to the head's interior.
  Yes, I believe it will waggle. It will require some scootin', but I think this soft blinker frame will function.The next step is to add the chamois material as prescribed in Mike Brose's tutorial. I"m wondering what will happen when the cloth is attached and the eye frame opens.The tutorial says it will bunch up. By applying some epoxy glue on the interior side of the chamois, the eyelid will stiffen and (hopefully) roll back into the head when open.
 No, I'm not talking to my doctor about Viagra. Nor am I suddenly foregoing Action/Thrillers for Chick Flicks. (Okay, I admit to liking some chick flicks).